
A prusik knot is a climbing knot commonly used with arborists that allows you to easily and quickly adjust the length of the usable ropes on your Flexia Reformer.
Sometimes, your knots may get tangled or are looped incorrectly, in which case it’s required to untie the knot and re-tie it. These instructions will show you how to re-tie the knot so you can easily and quickly adjust your rope length before and during a workout as needed.
THE INSTRUCTIONS BELOW ARE MEANT TO ACCOMPANY THIS SHORT INSTRUCTIONAL VIDEO. Before beginning, it is recommended that you view the knot tying process in three dimensions.
Orientation
The knots around the carriage can get confusing, but if you look closely there are actually two different thicknesses of ropes. The slightly thinner rope is sewn in a loop and attached to the carriage with a metal anchor. The slightly thicker rope goes through the pulleys and attached to the fleece oops you put your hands and feet in during a workout. Differentiating between the two will help you assess and untangle the knots.
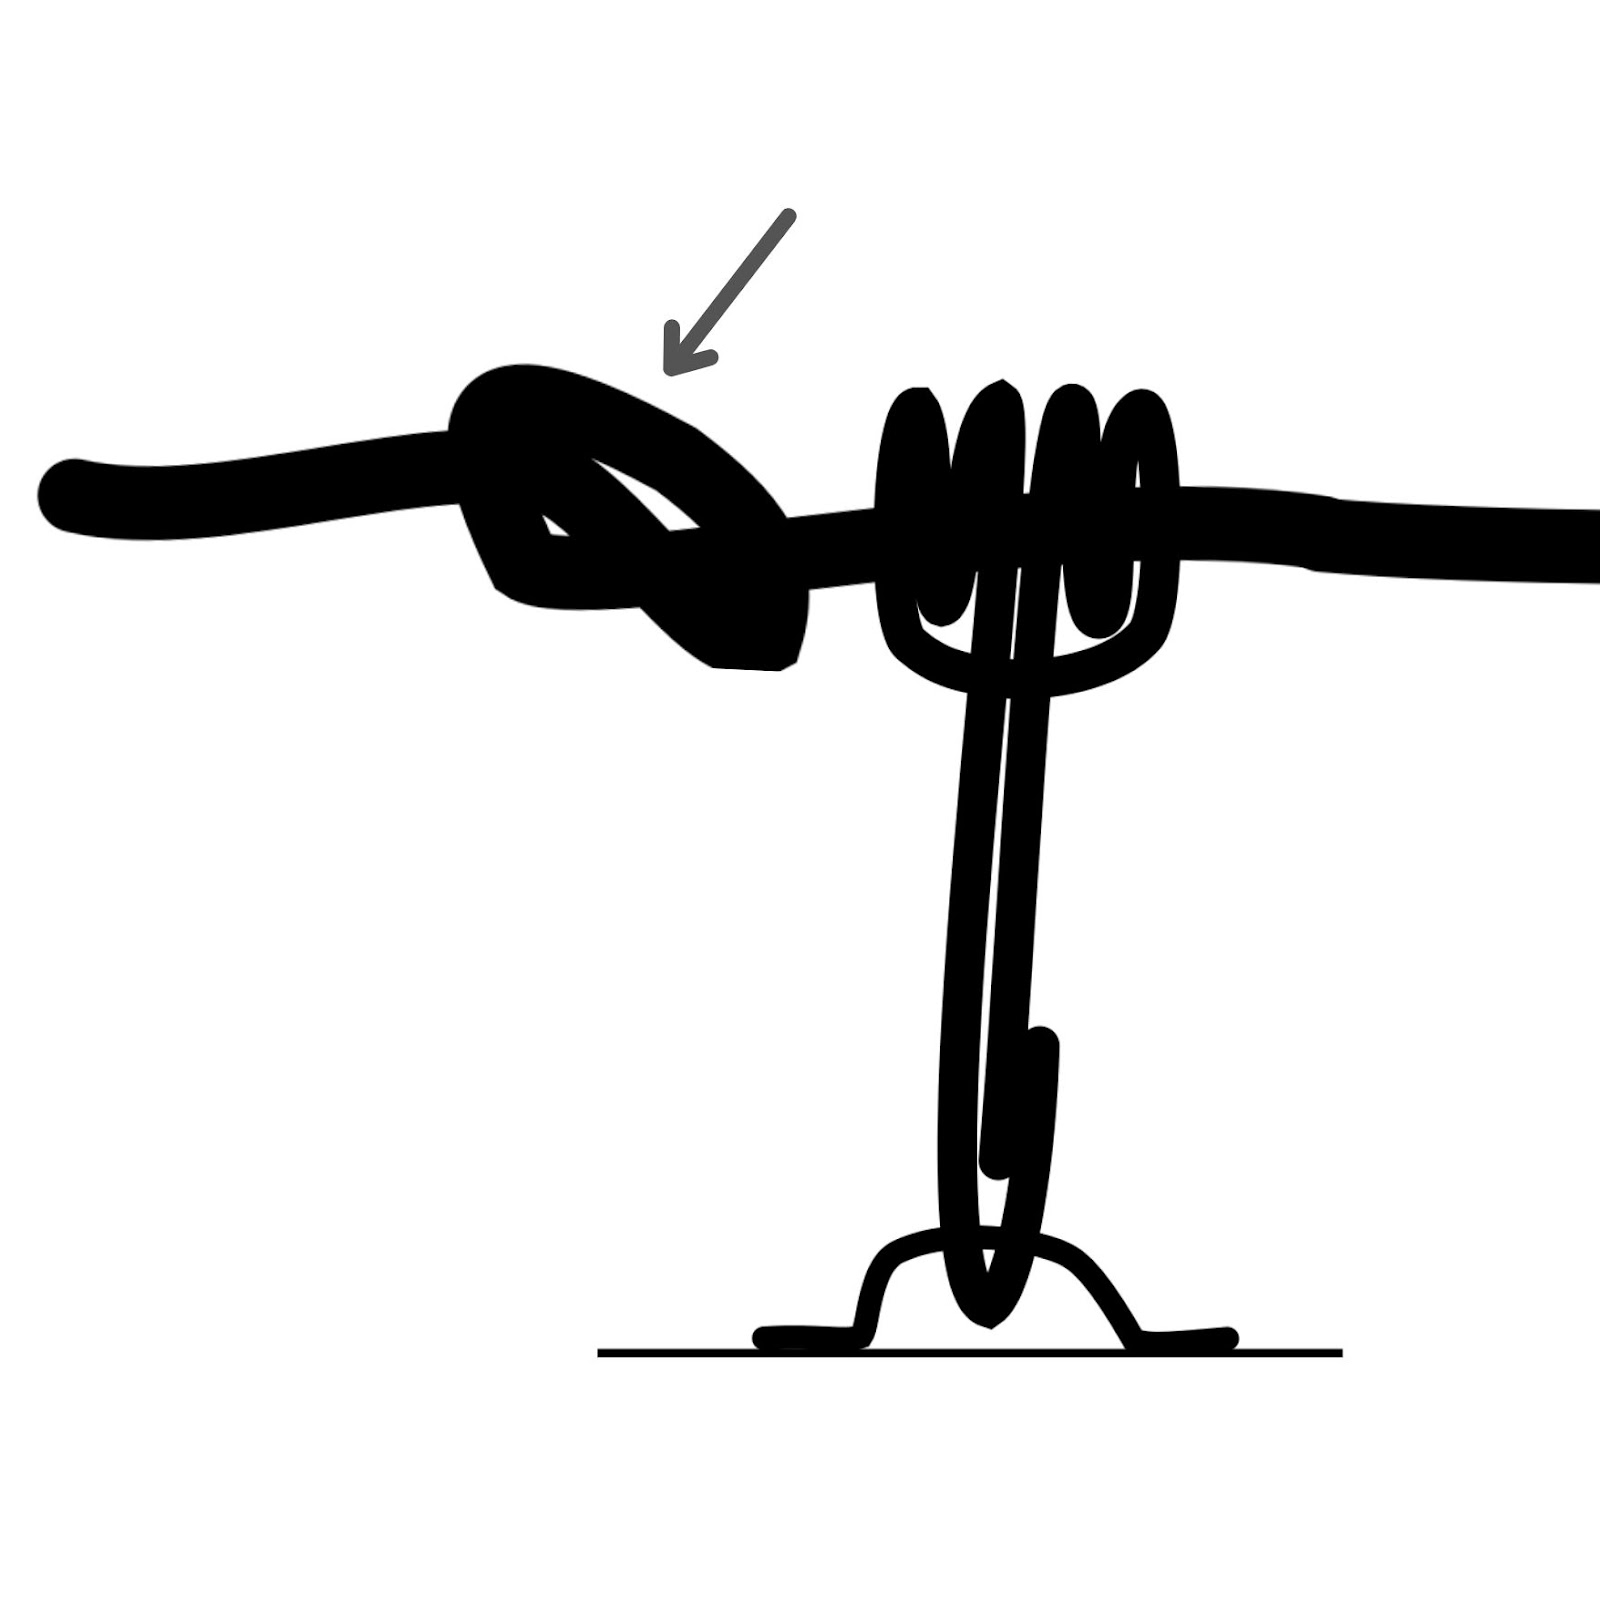
| Untie the simple knot at the end of the rope. This knot is meant simply to keep the thicker rope from inadvertently sliding through the prusik knot. |

| Slide the thicker rope out from the tangle of thinner ropes so the thick and thin ropes are totally separate. Let the end of the thicker rope you just slid free rest near you for now. Keep the rest of the thicker rope looped through the pulleys and attached to the foot loops. |
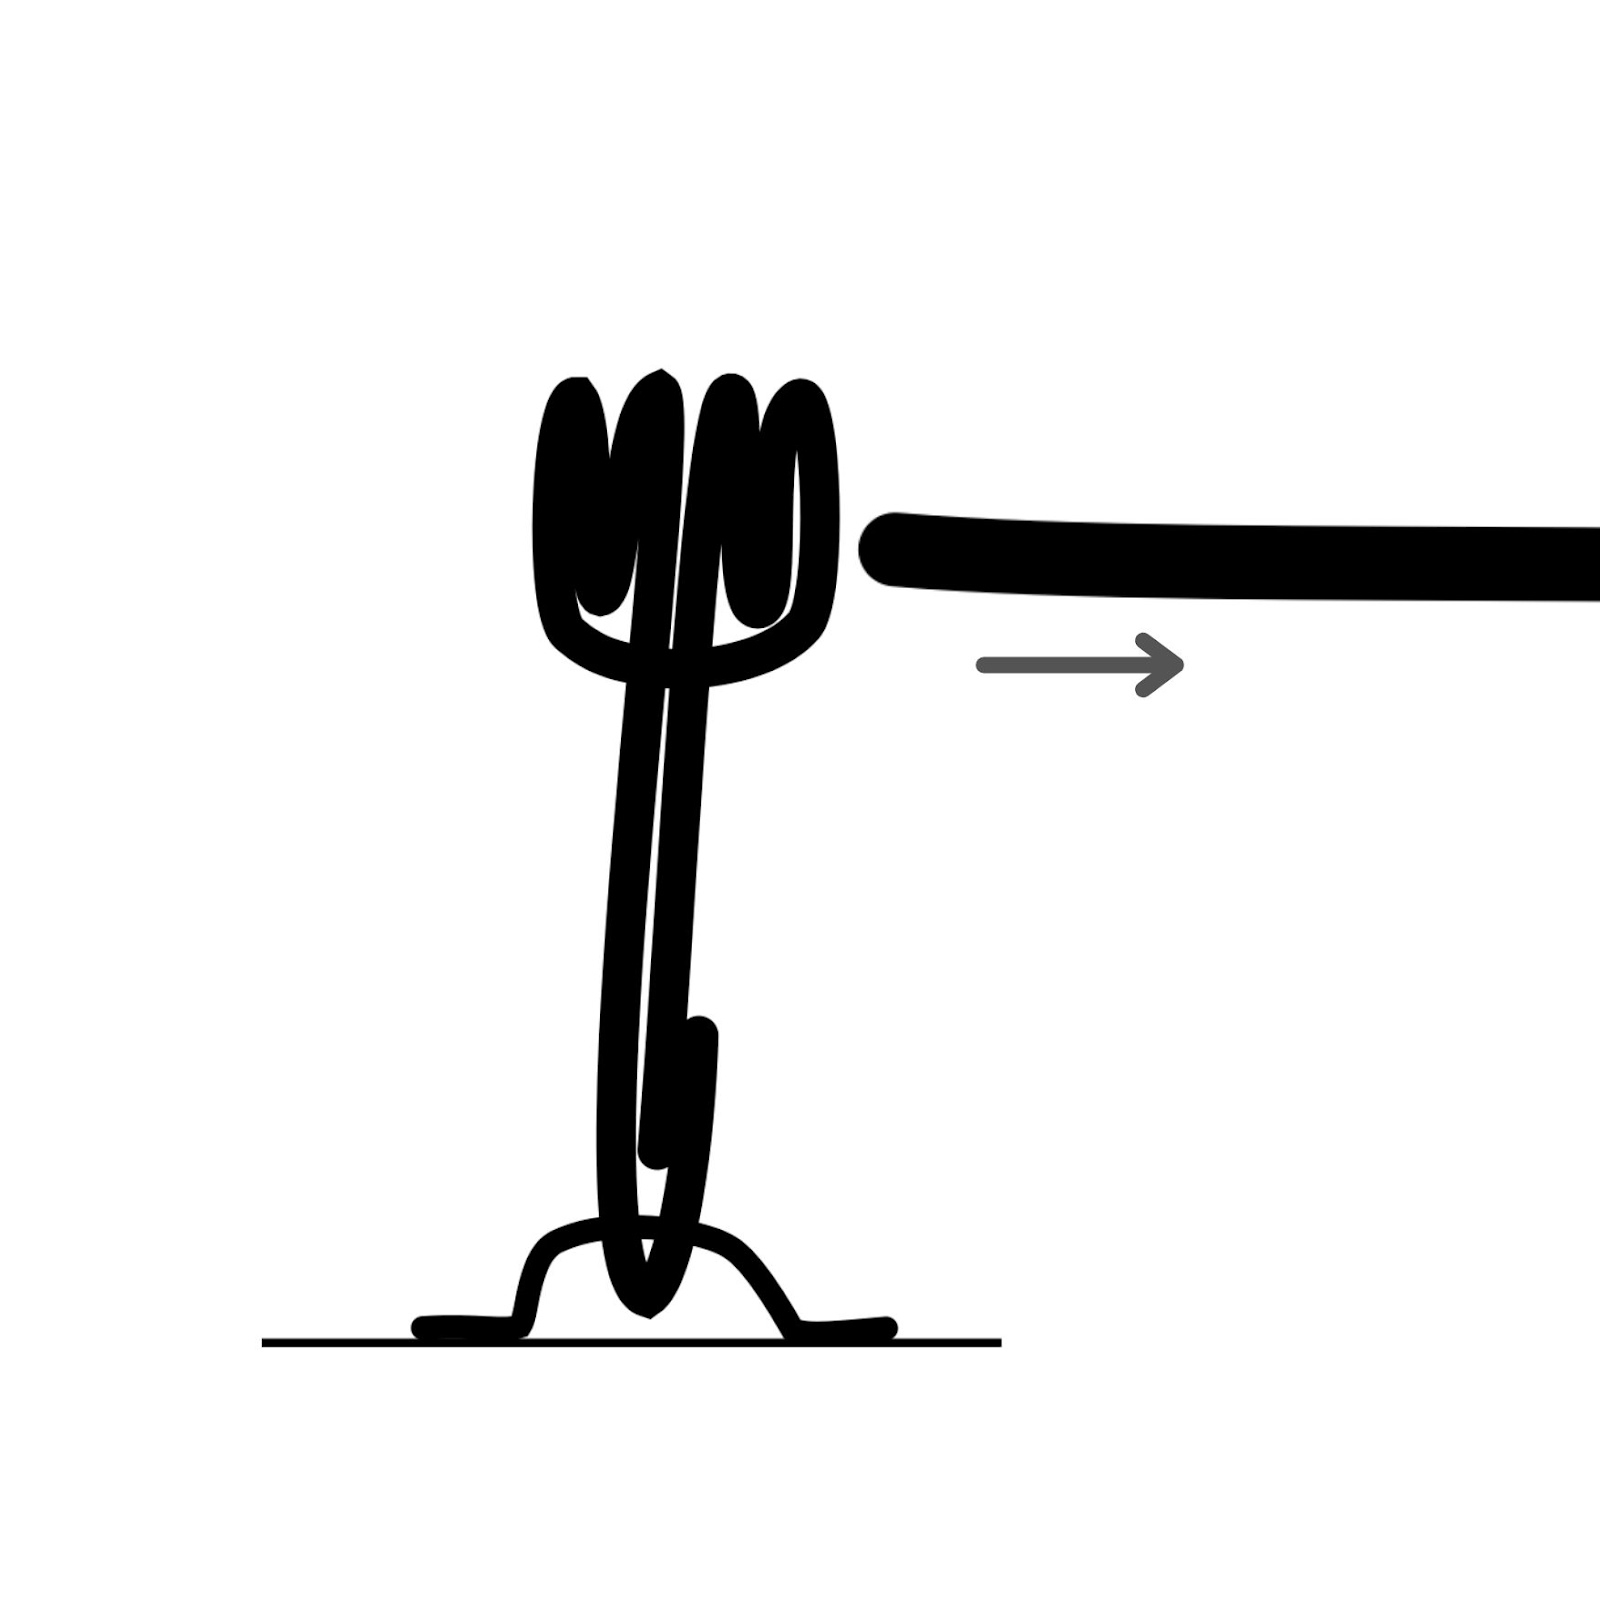
| Slide the thicker rope out from the tangle of thinner ropes so the thick and thin ropes are totally separate. Let the end of the thicker rope you just slid free rest near you for now. Keep the rest of the thicker rope looped through the pulleys and attached to the foot loops. |
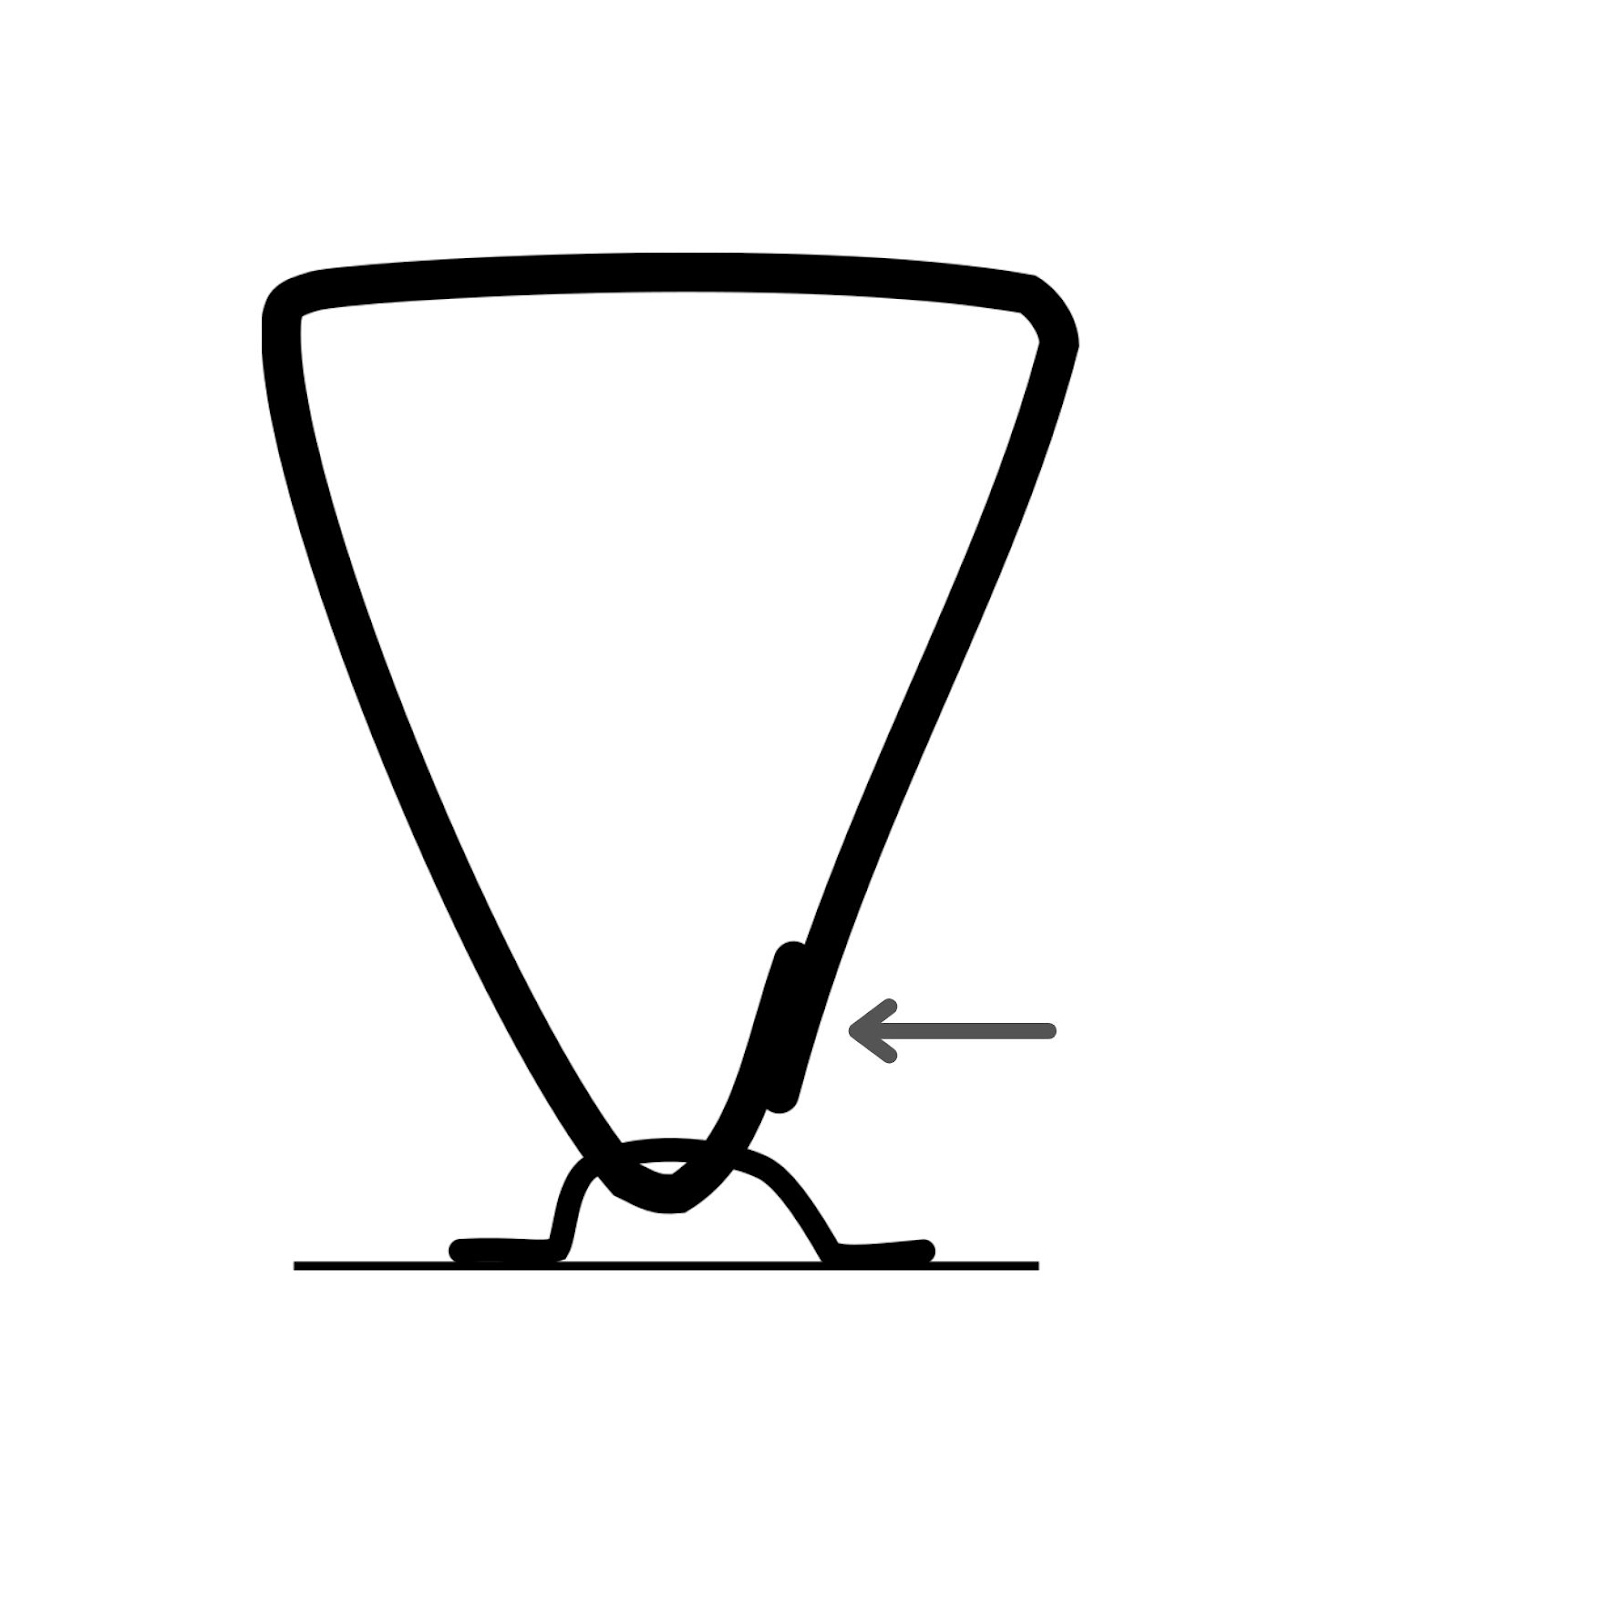
| Twist the rope to create a “smile. |

| Keep twisting the rope until you create two coils on either corner. In this step, ensure that the coils are on the inside of the sides of the triangle. This can feel a little awkward- there isn’t much rope to work with. That’s okay- you can do it! |

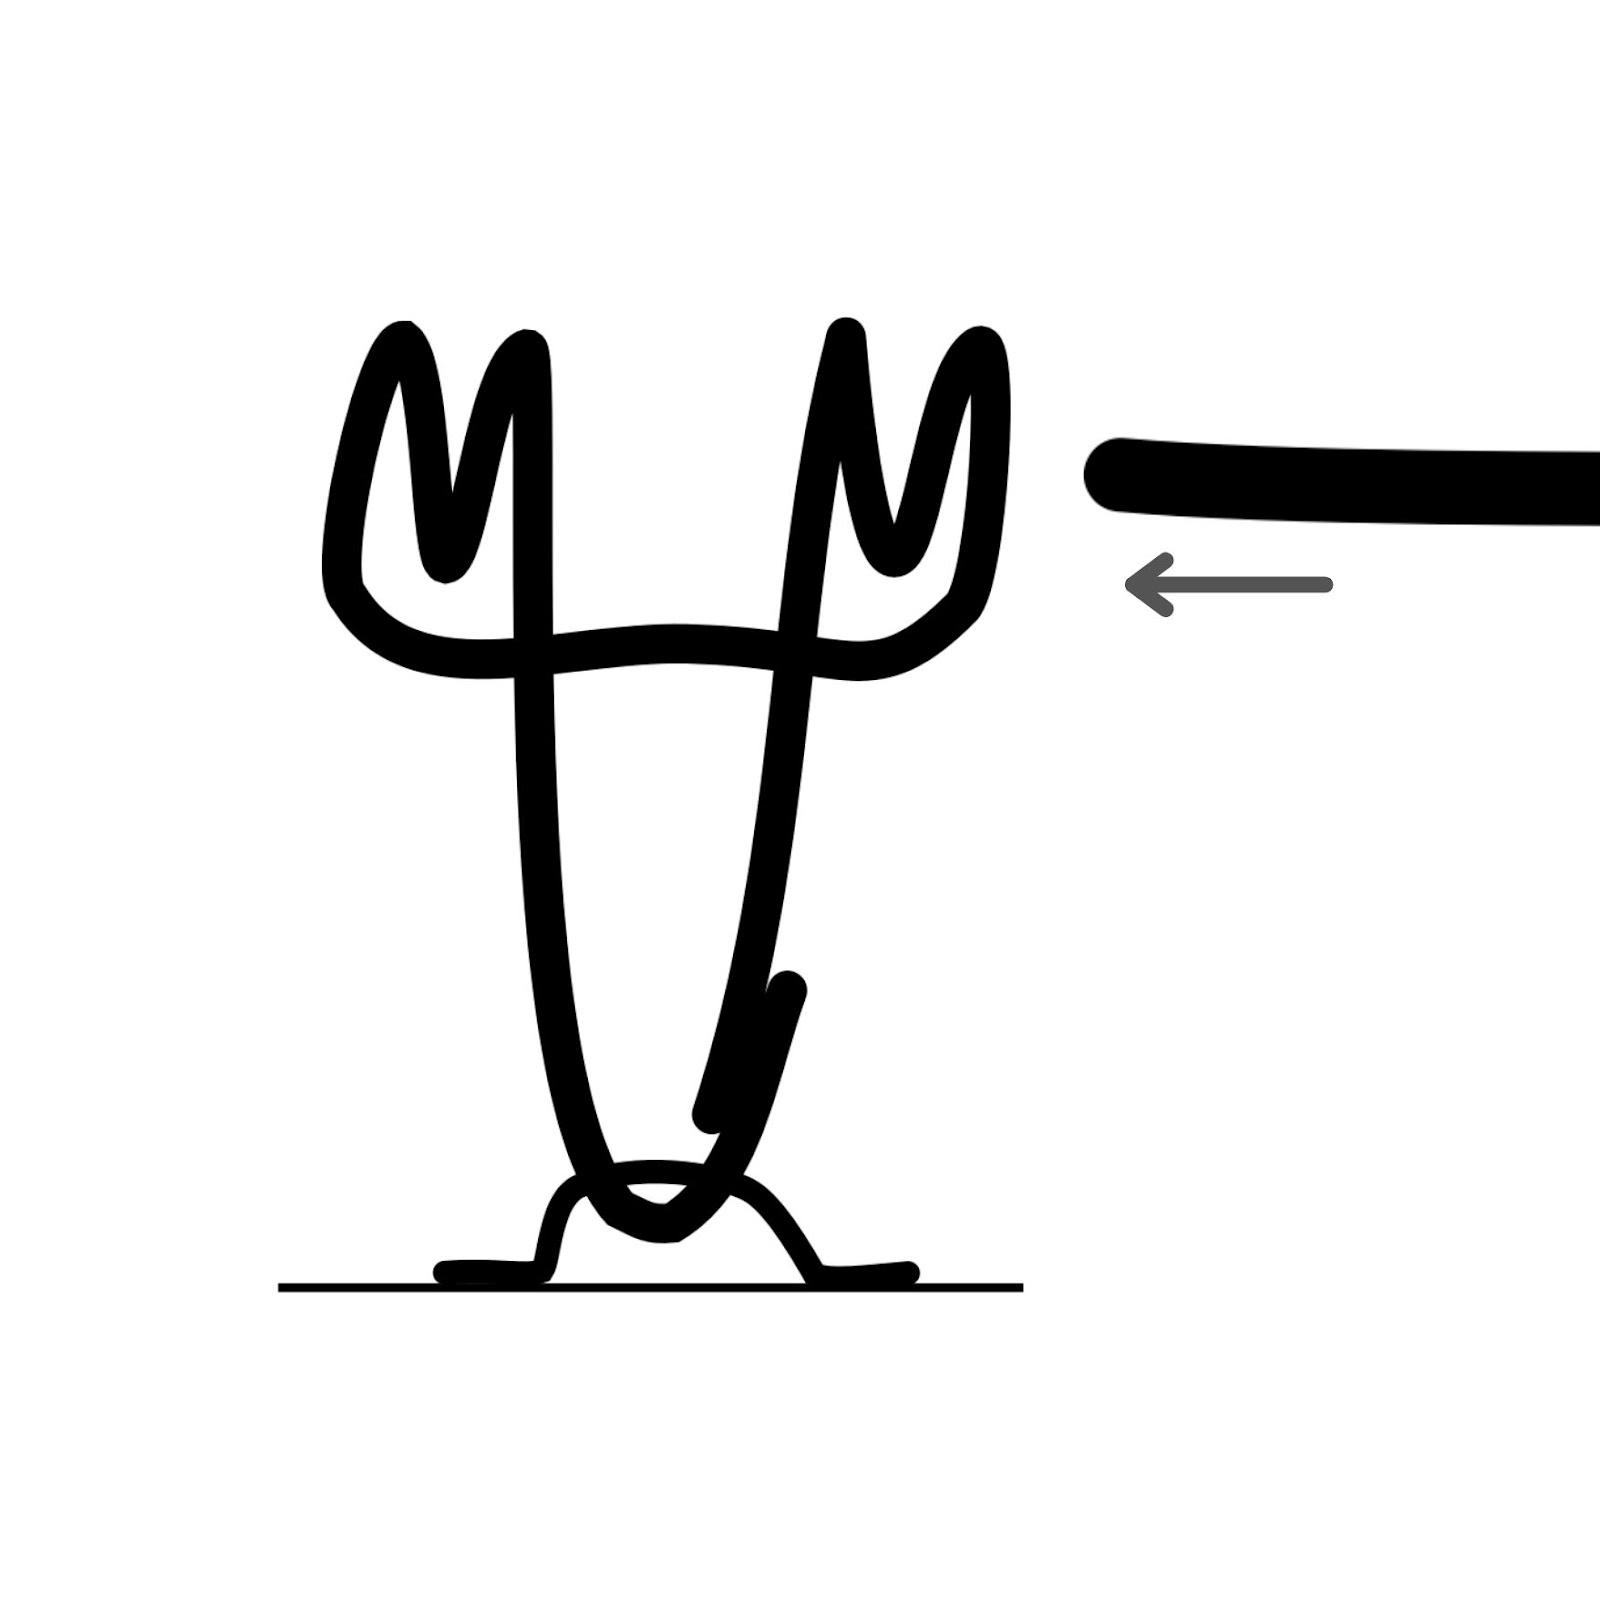
| Once you’ve achieved the orientation with two coils on each corner and the long edges to the outside, fold the entire triangle in half to bring the long outer edges to touch in the middle. |

| The long edges of the triangle are now straight down the middle, and there should be two coils in the corner. It now looks like rams horns. Lightly hold the rope in this shape. You are ready to insert the thicker rope through the tunnel of 4 coils you just created. |

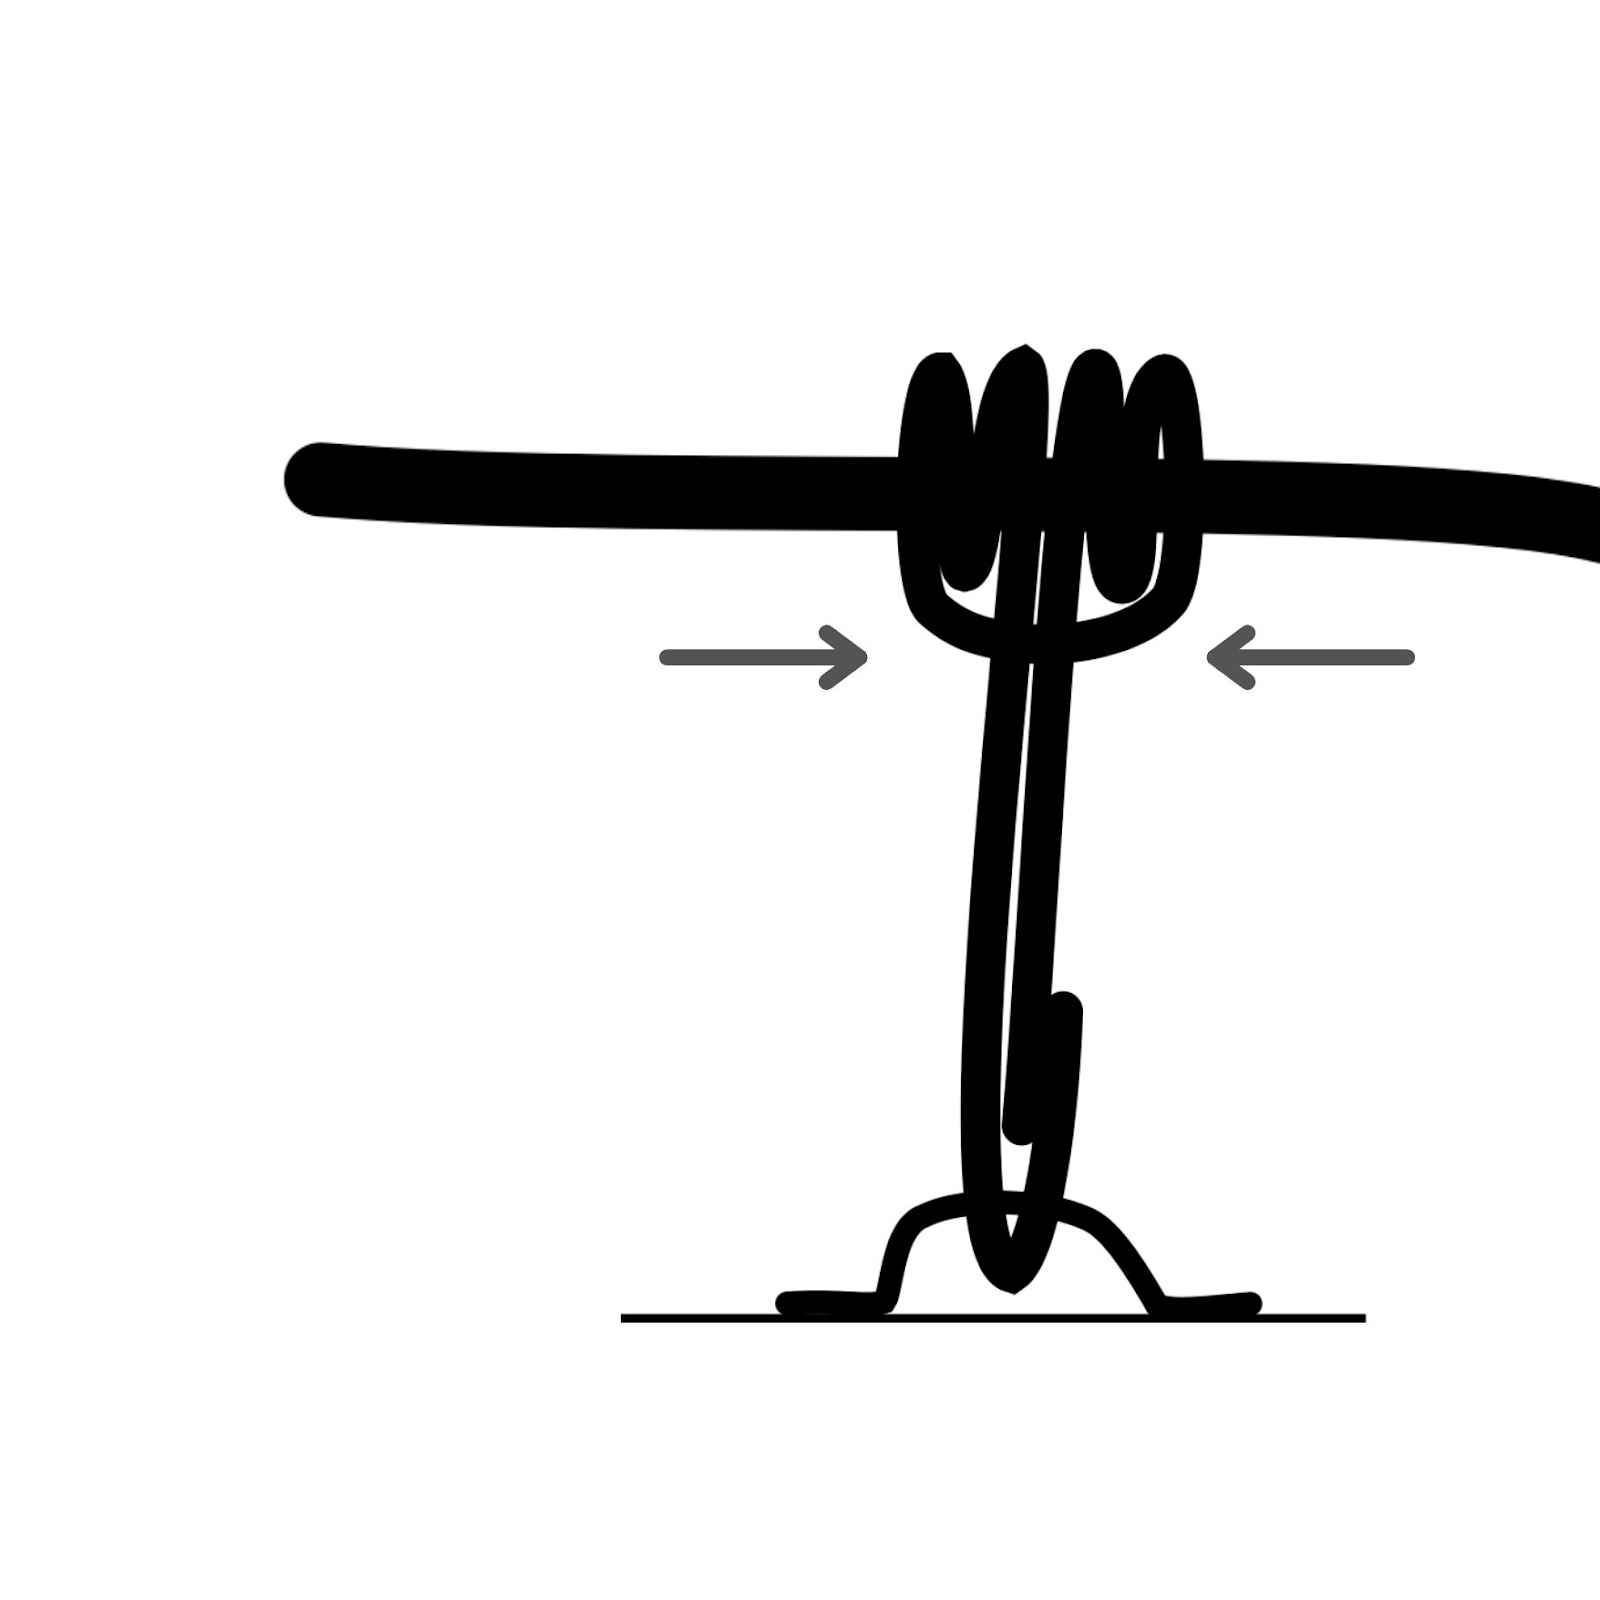
| Slide the thicker rope through the tunnel created by the 4 coils. You may need to massage the ropes gently to get the coils to expand without disrupting the knot to fit the rope through. Sometimes going one coil at a time helps. |
| Pull the rope through the prusik knot by using one hand to lightly hold the knot and the other to pull the thicker rope through. |

| Cinch the prusik knot so the coils are tight next to each other. TEST: If you let go of the prusik knot completely and yank on the thick rope that goes to the carriage a couple of times, the rope should NOT slide through the knot at all. |
| Tie a loose knot at the end of the thick rope to keep it from inadvertently sliding through. |
You are now ready to take a workout!
If you have any questions, please don’t hesitate to reach out to our team at hello@flexiapilates.com. We’re happy to help.